 Apologies for the long gap. We are back!
 Here's a challenge. Making a good custom-built insulating panel in 1910, without use of asbestos, custom ceramics, or plastics.
The great minds of the age started with wood. Tests were done and it was found that maple, a hardwood, was the best combination of strength, workability and a natural insulator. Except, of course, when it was wet. And wood is always somewhat wet. If you dry it out entirely, it cracks, and in any case, reabsorbs moisture from the air over time.
The idea was struck to use paraffin wax to offset the water. But how? Even if you melt it on, there's still water within the wood.
Experiments were tried with VPI (vacuum pressure impregnation). In this, the unit is dipped in resin, set in a pressure vessel, and a vacuum is drawn. Water boils at about 75 degrees F in a vacuum, so it boils off, the vapor taken in by the vacuum pump. There is literally nothing in the voids, so when vacuum is released (and shop air pressure applied), the resin is sucked into the voids. It's a great theory, it works on metal machines like traction motors. But alas - not wood!
As it happens, liquid wax is happily above the boiling temperature of water. So of course, they had tried simply immersing the wood in hot wax. Above 212 degrees, the water boils off nicely, replaced not with a void, but water vapor. When it cools, this vapor condenses to a tiny amount of water, creating a vacuum that should draw in the wax. Assuming the wax had not turned solid!
In the early days of electric equipment, a great deal of testing had been done on this. They examined wax saturation and insulation quality. With help from the railway preservation community at large, BAERA volunteers had done some research on this.

It turns out there was a very particular pattern of temperature control that was required - heating to high temperature to drive off water, then a lower temperature to allow wax to absorb. The sequence took several hours.
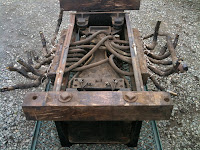
It was within the range of a common (nowadays) electric skillet. The board barely fit! Here we see it at the end of the cycle, the wax re-frozen.
One might look at the picture and think: "OK! Turn it back on, come back in 20 minutes, and fish the board out of the wax!" No. After it was out, the wax would flow out of the wood. In fact, the board must be removed with the greatest care - the wax can be barely softened, and heated with spot heat from a "hair dryer" just enough to wipe the excess away.
The wood has already been machined (drilled). This was a product of careful and repeated fitting to the car. Even with the refinement of these techniques, wax impregnation is far from complete. Machining afterward would have exposed areas of poor penetration.


